
Automated backups save your server's disks on a daily, weekly or monthly schedule. Choose how many backups to retain, then use them to restore the server or recover selected files.
TABLE OF CONTENTS
- Choose your backup settings
- Backup pricing
- Set the backup schedule
- Create a backup before a change
- Where backups are stored
- How retention works
- Recover from a backup
Choose your backup settings
Choose backup retention when creating a server, or open an existing server in mPanel and select Change Plan. Daily, weekly and monthly retention can be combined.
For a new server, select View All under the server settings to see the individual daily, weekly and monthly choices.
Backup pricing
Backup charges depend on provisioned storage and the number of backups retained. Check the quote shown in mPanel for your server before confirming your selection.
For example, the September 2026 quote for a new Sydney Standard server with a 20 GB disk prices onsite backups at A$0.05 per GB per retained backup per month. Two daily backups plus one weekly backup gives three retained backups at A$1 each: A$3 per month excluding GST. Offsite copies are priced separately at a flat rate per GB of the server's disk, not per retained backup; the quote shown in mPanel when you enable offsite copies gives the exact monthly figure for your server.
Retention is the number of backups kept, not a separate charge for every scheduled backup created.
Set the backup schedule
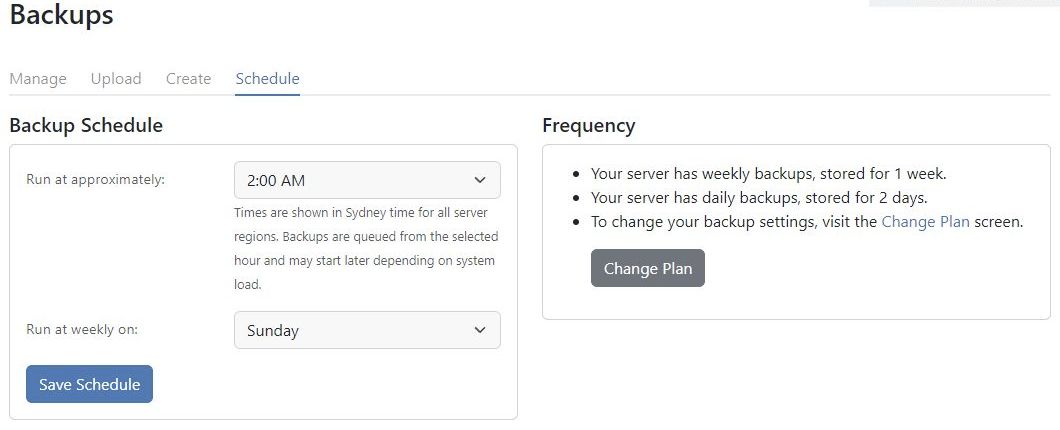
Open Backups > Schedule to choose the approximate start hour and the weekly backup day, then select Save Schedule. Change retention through Change Plan, not the schedule controls.
Times and days are shown in Sydney time for all server regions: the weekly backup day and the monthly backup date are Sydney calendar days, so for a Perth server a "Sunday 1am" weekly backup starts on Saturday evening Perth time. Backups are queued from the selected hour and may start later depending on system load.
The times shown for individual backups on Backups > Manage (and when downloading or restoring) are in your own computer's time zone, with the zone named, for example AEST or AWST. They can therefore differ from the Sydney-time schedule if you are in another time zone.
Create a backup before a change
Check which backup will be replaced
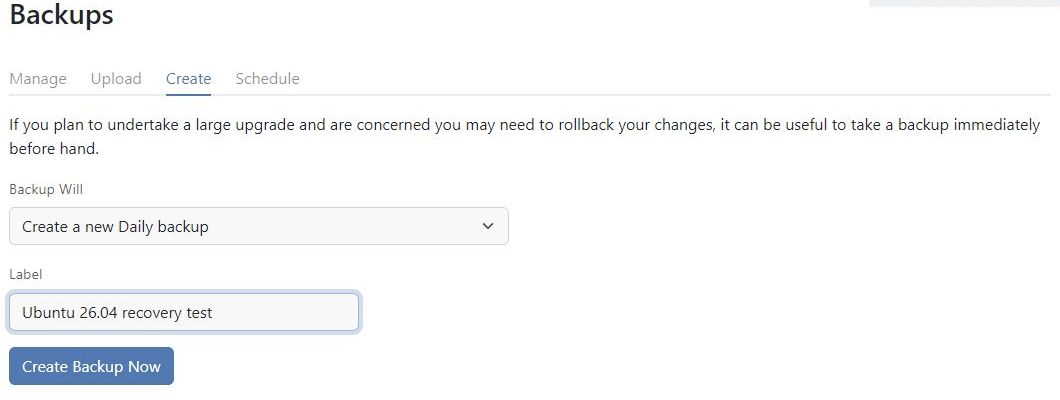
If you choose to replace an existing backup, check its label and date before starting. An in-progress backup cannot be cancelled.
Open Backups > Create, choose an available backup option, enter a descriptive label and select Create Backup Now. Wait for the backup to finish before relying on it for recovery.
Where backups are stored
Onsite backups are stored separately from the server in the same data centre. Optional offsite copies go to BinaryLane-managed Amazon S3 storage in the Sydney region (Australia) and provide a copy outside that data centre; this is the only offsite option. Amazon S3 is operated by a U.S. company and is subject to the U.S. CLOUD Act; if data sovereignty matters to you, leave offsite copies off and download backups on a schedule to storage you control instead. Backups are not encrypted at rest. If you need your backups encrypted, encrypt the data at rest inside the server (full-disk or volume encryption): a backup of an encrypted disk is itself encrypted, and you hold the keys.
How retention works
Daily, weekly and monthly backups have separate retention counts. When a frequency's available slots are full, its oldest unlocked backup is replaced.
When schedules coincide, the less frequent backup takes precedence. For example, a scheduled weekly backup replaces that day's daily job rather than creating an identical daily copy.
You can lock an individual backup in Backups > Manage to prevent replacement until it is unlocked. Attached backups are automatically locked. Temporary backups cannot be manually locked.
Recover from a backup
Restoring replaces the server's disks
A full restore discards changes made since the selected backup and takes the server offline during restoration. Copy out anything you still need before restoring. Use file recovery instead when you only need selected files.
- Recover selected files on your VPS: attach a backup as a second disk and copy the files you need.
- Recover files on your Windows computer: download the backup and extract files locally.
- Restore the whole server: open Backups > Manage, select the backup and choose Restore.... Check the server and backup date in the confirmation before selecting Restore Backup.
After restoring, wait for the operation to complete, then connect to the server and check your files and services. A completed disk restore does not by itself confirm that every application is working.