
Create a separate data disk using mPanel's disk allocations, then make it available as a drive in Windows. Keeping the OS and data in separate allocations also lets you assign extra storage to the Windows disk later.
Does this apply to an internally partitioned disk?
No. These steps are for separate disk allocations managed through mPanel. They do not repair or convert a Windows disk that has already been internally partitioned or otherwise modified.
If mPanel reports that the disk has been split into multiple partitions and cannot be resized, stop and contact support with the exact error and a screenshot of Disk Management. Shutting down the server does not remove this restriction. Do not delete partitions or rebuild the server to make the resize proceed.
TABLE OF CONTENTS
- Does this apply to an internally partitioned disk?
- Applies to
- Before you begin
- Will my server restart?
- Make space for the new disk
- Create the data disk
- Prepare the new disk in Windows
- Verify the new data drive
- Grow the Windows disk when you have a separate data disk
Applies to
BinaryLane Windows servers using mPanel disk allocations and a supported Windows disk layout. The examples use Windows Server 2025, with one NTFS volume on each separate OS and data disk. C: and D: drive letters alone do not prove that you have separate disks: both can be partitions on the same disk.
Before you begin
You need mPanel access and administrator access to Windows. Open Settings > Disks for the server and record the existing allocations. In Windows, open Disk Management and record the existing disk sizes and volumes so you can identify the new disk afterwards.
Back up before changing disk allocations
Create a current server backup and check that you can recover the files you need. Allow for downtime when resizing the Windows disk and read any reboot confirmation before proceeding. Increasing the storage plan changes the server's price; review the quote before confirming.
Will my server restart?
Allow for downtime when changing disk allocations in mPanel. Resizing the Windows SYSTEM disk requires Windows to shut down. Adding a disk or changing the storage plan can also require a restart; read the confirmation before proceeding and schedule the change when an interruption is acceptable.
If mPanel offers Continue Waiting, check the console first. Use it while Windows is still installing updates or shutting down. Do not force a shutdown just because the waiting prompt appears: interrupting Windows can damage files or leave updates incomplete. If the operation fails or Windows stops making progress, record the message and contact support before forcing the server off or retrying.
Wait for the mPanel operation to finish before reconnecting. If you shut down Windows beforehand and the server remains stopped after a successful resize, start it using Power Cycle in mPanel.
Make space for the new disk
A new allocation uses the server's unallocated storage shown in mPanel. Free space inside C: is not the same as unallocated storage in mPanel.
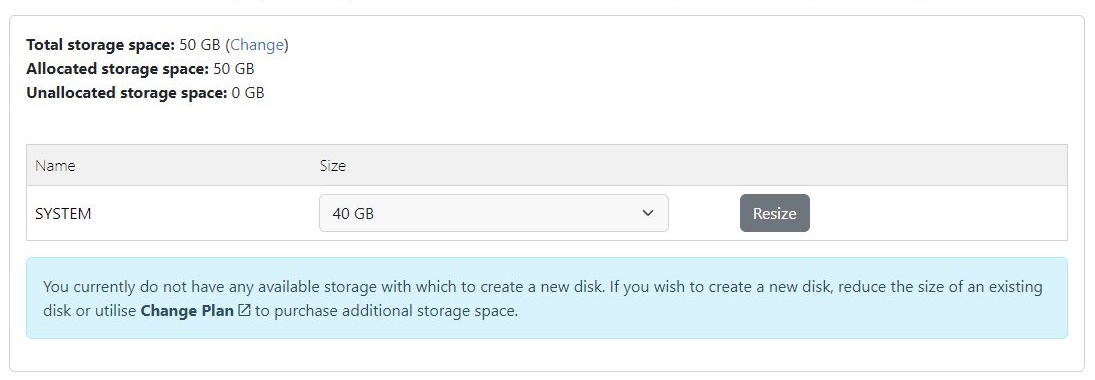
- Open the server in mPanel and select Settings > Disks.
- Check Unallocated storage space. If there is enough for the new disk, continue to Create the data disk.
- If there is not enough, either increase the server's storage plan or reduce an existing supported allocation. Only reduce SYSTEM if Windows has enough free space and the remaining size leaves room for the OS, applications and updates.
To release space from SYSTEM, select its smaller size in mPanel, select Resize, and review and confirm the reboot prompt. Wait for the operation to complete. For example, reducing SYSTEM from 50 GB to 40 GB makes 10 GB available for a new allocation. Do not shrink or create extra partitions inside Windows for this procedure.
To buy additional capacity instead, open Change Plan, keep Continue using Windows Server selected, adjust storage and review the resulting allocations, backup option and price before confirming. After completion, check Settings > Disks again. Do not assume that increasing the plan has left unallocated capacity: check the resulting allocation sizes before proceeding.
Create the data disk
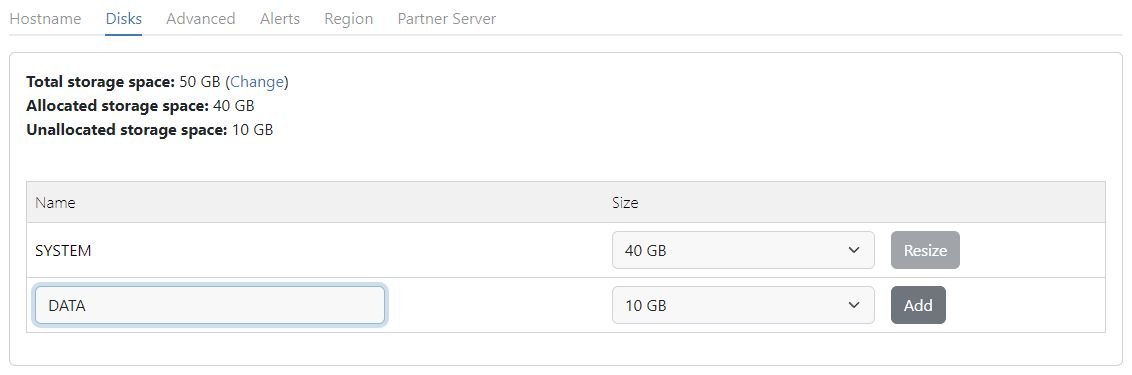
- In Settings > Disks, enter a name for the new allocation, such as DATA, and select its size from the available unallocated storage.
- Select Add. Read and confirm the operation prompt, then wait for completion.
- Check that mPanel lists SYSTEM and DATA as separate allocations with the intended sizes. The example uses SYSTEM 40 GB and DATA 10 GB.
Prepare the new disk in Windows
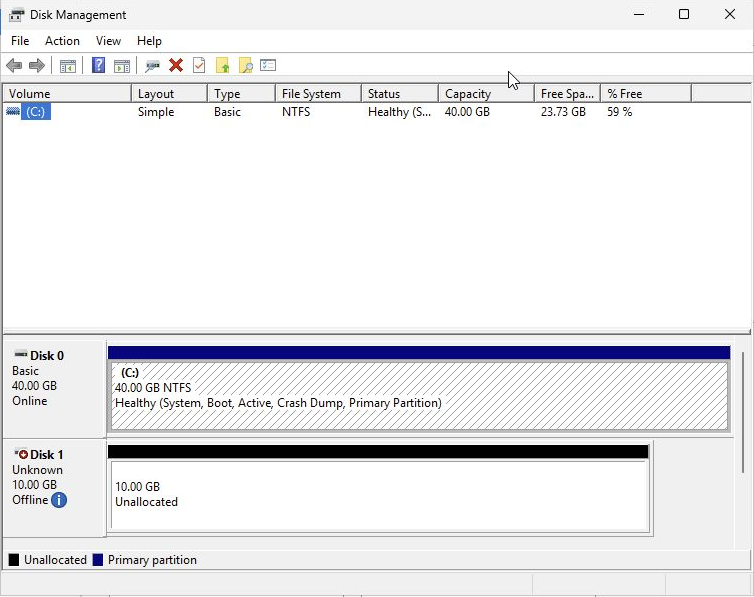
Connect to Windows with an administrator account. Press Windows+R, enter diskmgmt.msc, and open Disk Management.
Initialise and format only the new empty disk
Match the new disk's size against the allocation you just created and compare it with your earlier disk list. Do not initialise or format the Windows disk, an existing data disk or an attached backup. Disk numbers and drive letters can differ from the example.
- Identify the newly added disk. In this example it is Disk 1, 10 GB, initially Offline and Unallocated.
- If it is offline, right-click its label in the left pane and select Online.
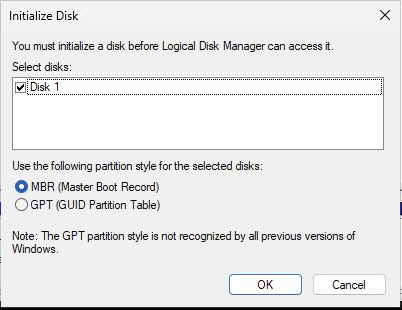
- If it is not initialised, right-click its label and select Initialize Disk. Confirm that only the intended new disk is selected. The 10 GB example uses MBR; do not change the partition style of an existing disk to follow this example.
- Right-click the new disk's unallocated space and select New Simple Volume.
- Use the maximum volume size to create one volume across this allocation, then assign an available drive letter. The example uses D:.
- Select NTFS, leave the allocation unit size at Default, enter DATA as the volume label and select Perform a quick format.
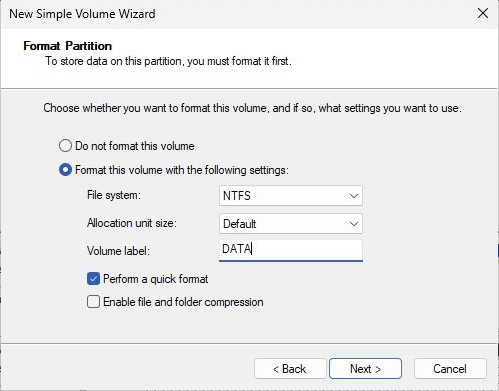
- Review the summary, check the disk and size again, then select Finish.
Verify the new data drive
Check that Disk Management shows the original Windows volume and the new DATA volume as healthy, with the expected sizes. Open the new drive in File Explorer and confirm you can create and read a file there. Check that your existing files on C: are still available.
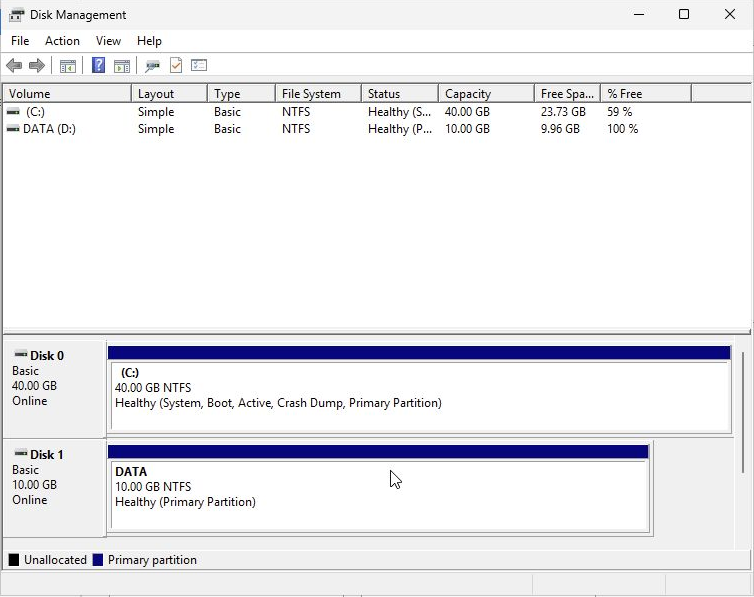
The new data drive does not automatically move applications or files off C:. Choose what to store there according to your application's own configuration and migration instructions.
Grow the Windows disk when you have a separate data disk
If C: is running out of space and you used mPanel to divide your server's storage into separate OS and data disks, you can increase the Windows disk without increasing the data disk. This example grows SYSTEM from 40 GB to 45 GB while DATA stays at 10 GB.
Make additional storage available
- Open the server in mPanel and select Settings > Disks. Check the SYSTEM and DATA sizes and the Unallocated storage space.
- If enough unallocated storage is already available, go to the next section. Otherwise, open Change Plan, leave Continue using Windows Server selected and increase Storage. Keep the other resources and backup settings as required.
- Review the change summary and price. Under Backup Will, select the appropriate pre-change backup option. Accept the terms if you agree, select Change Plan and confirm.
- Wait for completion, then return to Settings > Disks. In this two-disk example, increasing total storage from 50 GB to 55 GB leaves 5 GB unallocated. SYSTEM remains 40 GB and DATA remains 10 GB.
Unallocated storage in mPanel is capacity available to assign to a disk. It is not yet additional space inside C:.
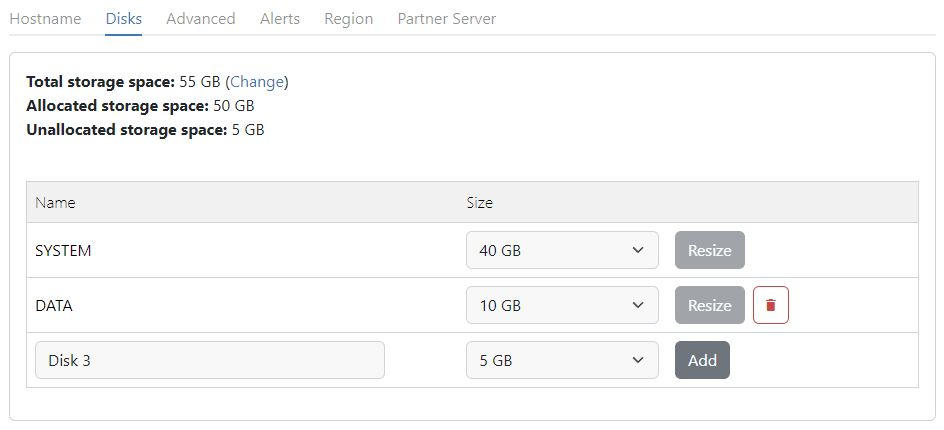
Assign the spare storage to SYSTEM
- In the SYSTEM row, choose the new size, 45 GB in this example. Leave DATA unchanged.
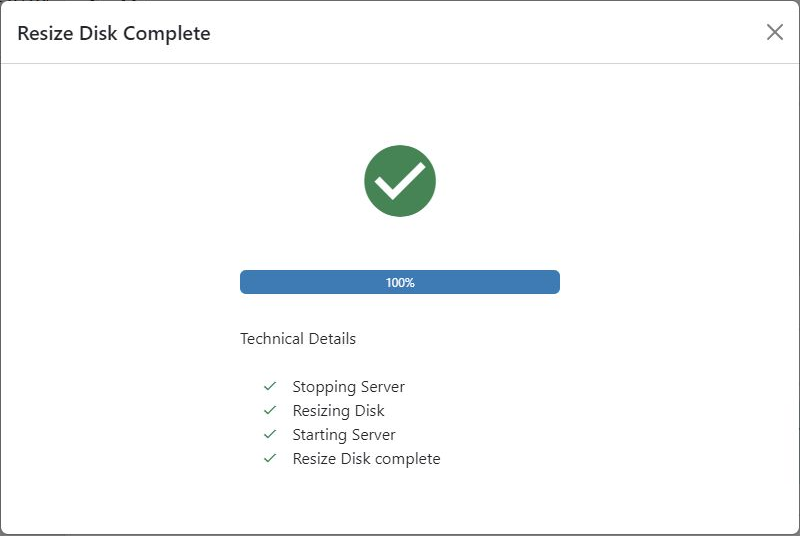
- Select Resize beside SYSTEM and confirm the reboot prompt. Wait for the operation to complete.
- Check that mPanel now shows SYSTEM at 45 GB and DATA at 10 GB.
If a shutdown waiting prompt appears, check the console. Allow Windows updates or shutdown activity to finish using Continue Waiting; do not force shutdown simply because the prompt appears. If the operation fails, record the error and check the server's state before taking further action.
Verify the result in Windows
Log in after the server starts and check the volume sizes, health and your files. If you deliberately shut the guest down before resizing and it remains stopped afterwards, start it using Power Cycle in mPanel.
Open PowerShell as administrator and run:
Get-VolumeIn this example, C: is 45 GB and DATA (D:) is still 10 GB, with both reporting Healthy and OK. C: grew as part of the mPanel resize; no manual Windows volume extension was needed. Check files on both volumes as well as their sizes.
